Smart Home 101: Simple Tech Upgrades for a Modern Living Space

The world of smart home technology can be daunting, but creating a modern living space doesn’t have to be complicated. With just a few simple tech upgrades, you can turn your home into a sleek, efficient, and connected haven. So, where to begin?

First things first, assess your needs and priorities. Do you want to focus on convenience, energy efficiency, or entertainment? Perhaps you want a comprehensive system that integrates all of the above. Prioritizing your needs will help guide your choices and ensure you create a smart home that aligns with your lifestyle.

Let’s start with the basics: lighting. Smart lighting systems offer remote control and automation capabilities, allowing you to adjust the ambiance and brightness of your home with a tap on your phone or a voice command. You can also set schedules to turn lights on and off at specific times, simulating presence when you’re away and saving energy.

Another essential upgrade is a smart thermostat. These devices learn your habits and preferences, automatically adjusting the temperature to keep you comfortable while minimizing energy waste. Many also provide energy usage reports, helping you make informed choices to reduce your carbon footprint.

Then there’s the entertainment factor. Upgrading your audio and visual systems can transform your home into a theater-like experience. Imagine controlling your music and podcasts with your voice, or streaming your favorite shows and movies to any room in the house.

Security is also a key consideration. Smart security systems offer peace of mind, allowing you to monitor your home remotely and receive alerts if anything is amiss. You can also control smart locks and garage doors from anywhere, ensuring your home is secure even when you’re not there.

To tie it all together, consider a smart home hub or voice assistant. These act as a central command for all your connected devices, allowing for seamless integration and providing you with a single interface to control your entire smart home ecosystem.

Remember, when choosing smart home devices, compatibility and ease of use are key. Opt for well-known brands that offer broad compatibility, and always read reviews to ensure the devices will meet your expectations.

Finally, don’t be intimidated by the setup process. Many smart home devices are designed for easy DIY installation, and with a bit of planning, you can create a modern living space that’s both impressive and intuitive. Happy upgrading!

The Homeowner’s Guide to Dealing with Common Plumbing Problems

As a homeowner, you’re bound to encounter plumbing problems at some point. While some issues may require the expertise of a professional plumber, there are many common plumbing problems that you can tackle yourself with the right tools and knowledge. So, roll up your sleeves and get ready to become your own handyman!

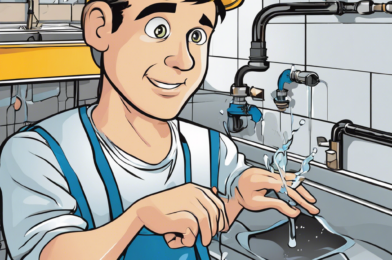
One of the most frequent issues is a clogged drain. This can often be resolved with a plunger or a drain snake. For more serious clogs, you may need to remove the trap under the sink and clean it out. It’s a dirty job, but someone has to do it! To prevent clogs, be mindful of what goes down your drains and invest in hair catchers for your shower and tub drains.

Leaky pipes are another nuisance that can range from a minor drip to a full-blown geyser. Minor leaks can often be fixed by simply tightening a connection or replacing a worn-out washer. For larger leaks, you may need to replace a section of the pipe. It’s important to act quickly to minimize water damage and to prevent the growth of mold and mildew.

Knowing how to shut off the water supply to your home is crucial in an emergency. Locate your home’s main water shut-off valve and make sure you have a working shut-off key or tool. Also, know where the individual shut-off valves are for your toilets, sinks, and other fixtures.

Low water pressure is an annoying issue that can make simple tasks like showering or washing dishes take longer. It could be caused by buildup in your pipes, a faulty fixture, or even a hidden leak. Start by cleaning your showerheads and faucet aerators, then check for leaks and ensure all supply valves are fully open.

Dripping faucets are not only annoying but also wasteful. Fixing a leaky faucet often involves replacing the washer or O-ring, which are inexpensive and easy to find at any hardware store. If you’re unsure how to disassemble your particular faucet, a quick online search will usually yield step-by-step instructions specific to your model.

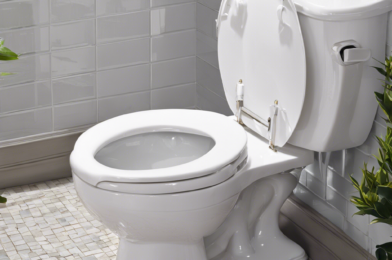
Toilet troubles are a common headache for homeowners. Whether it’s a clog, a leak, or a faulty flush mechanism, most toilet issues can be resolved with some basic troubleshooting and a few common tools. Remember to never flush anything other than toilet paper and human waste to avoid clogs.

Lastly, always be prepared for plumbing emergencies by having key tools on hand, such as a plunger, a pipe wrench, and a basin to catch any spills. Taking a proactive approach to maintaining your home’s plumbing will save you time, money, and the headache of dealing with a plumbing crisis. Stay informed, be prepared, and don’t be afraid to get your hands dirty!

DIY Furniture Makeover: Breathe New Life into Old Pieces

Giving old furniture a makeover is a fun and creative way to refresh your space without breaking the bank. With a few simple techniques and a bit of elbow grease, you can transform tired, outdated pieces into something unique and full of character.

The trend for upcycling and repurposing furniture has grown in popularity in recent years, fueled by a desire to be more sustainable and a willingness to embrace individuality in our homes. Social media platforms like Pinterest and Instagram have also played a part, with users sharing their creative projects and offering a wealth of inspiration and ideas.

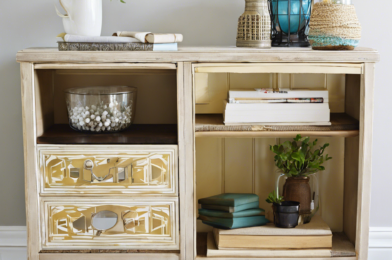
So, where do you start? Firstly, source some second-hand furniture. Scour thrift stores, garage sales, and online marketplaces for pieces with good bones that just need a little TLC. Look for solid wood construction and interesting details – these are the pieces that will really come to life with a makeover.

When you’ve found your piece, it’s time to decide on a vision. Do you want to go for a bold and dramatic transformation, or keep things simple and elegant? Sanding and refinishing wood furniture can bring it back to life, or you might choose to paint it with a pop of color. Adding new hardware, such as handles or knobs, is an easy way to update a piece and make it feel modern and stylish.

If you’re feeling more adventurous, there are plenty of techniques to try, such as decoupage, stenciling, or distressing. These methods can give your furniture a unique, one-of-a-kind look and are often easier to achieve than you might think. A little imagination goes a long way!

For a truly individual touch, consider incorporating unique details like embossed patterns, gold leaf, or even fabric. These unexpected elements will give your furniture a bespoke feel and are sure to become talking points in your home.

Once you’ve transformed your furniture, it’s time to step back and admire your handiwork. Not only have you created something beautiful and unique, but you’ve also saved money and kept items out of landfills. It’s a win-win!

So, what are you waiting for? Roll up your sleeves, get creative, and breathe new life into old furniture. With a DIY furniture makeover, the possibilities are endless. It’s an enjoyable and rewarding way to express your personal style and create a space that truly feels like you.

Transform Your Backyard: Easy Landscaping Ideas for Beginners

Transforming your backyard doesn’t have to be a daunting task, even for beginners. With a few simple landscaping ideas and some elbow grease, you can create an outdoor oasis that will be the envy of the neighborhood. So, whether you’re looking to boost your curb appeal or create a relaxing retreat, here are some easy landscaping tips to get you started.

First things first: plan out your space. Consider the size and shape of your backyard and decide on a focal point. This could be a beautiful tree, a garden bed, or a water feature. Thinking about how you want to use your yard is essential; do you want to entertain guests, create a play area for kids, or develop a quiet space for relaxation? Once you’ve determined the purpose of your backyard, you can start to choose the plants and features that will help bring your vision to life.

One of the easiest ways to add interest to your backyard is to play with the height and texture of your plantings. Mix and match tall, slender trees with bushy shrubs and ground-covering vines. This will create a dynamic and visually appealing space. Don’t be afraid to get creative with the types of plants you choose. Add a pop of color with flowering shrubs or create a serene atmosphere with delicate, hanging vines.

Hardscaping is another crucial element in landscaping. This refers to the non-living features of your backyard, such as walkways, patios, and retaining walls. These elements can help define different areas of your yard and create a sense of structure. When planning your hardscape, consider using materials that complement each other and fit within the style of your home. For example, a stone patio with a cozy seating area can provide the perfect spot for entertaining, while a meandering flagstone path can add charm and lead guests through your carefully curated garden.

Water features, such as fountains or small ponds, can also enhance the tranquility of your backyard. Not only do they provide a focal point, but the soothing sound of running water can create a sense of calm. If you’re feeling adventurous, you can even try your hand at installing a water feature yourself. Many DIY kits are available that make adding a fountain or pond a relatively simple project.

When it comes to lighting, solar-powered options are a great way to illuminate your backyard without the hassle of wiring. Place lights along pathways or embed them in the ground to highlight specific plantings or features. String lights are another popular choice, adding a whimsical touch to any outdoor space.

Finally, don’t forget to add some personal touches to your backyard. Perhaps you want to include a comfortable hammock for afternoon naps or a vibrant outdoor rug to define your seating area. These finishing touches will make your backyard feel like a true extension of your home.

Remember, landscaping is a creative process, and there are no hard and fast rules. So, have fun, get your hands dirty, and don’t be afraid to experiment. With a bit of effort, you’ll be able to transform your backyard into the stunning and functional space you’ve always wanted. Happy gardening!

How to Fix a Running Toilet: A Step-by-Step Tutorial

Toilet troubles are a nuisance, and a running toilet can be especially frustrating, not to mention costly. The constant sound of water flowing and the potential waste of hundreds of gallons of water are enough to drive anyone crazy. But fear not! Fixing a running toilet is often a straightforward DIY project that anyone can tackle with the right tools and a bit of know-how. So, if you’re brave enough to venture into the world of toilet repair, here’s a step-by-step guide to help you emerge victorious.

First things first: before you begin, make sure you have a basic understanding of how your toilet works. The mechanism may seem simple, but there are a few key components that work together to ensure proper flushing and refilling. Familiarize yourself with the tank, bowl, flush valve, fill valve, and flapper – these are the parts you’ll be working with. You can find diagrams and videos online that illustrate their functions. Now, roll up your sleeves and let’s dive into the steps to fix that pesky running toilet once and for all.

Start by shutting off the water supply to the toilet. This is typically done by turning the valve located near the base of the toilet clockwise. Once the water is shut off, flush the toilet to empty the tank. This will give you a clear workspace and ensure that the water isn’t continuously running while you work. With the tank empty, you can begin your inspection.

Examine the inner workings of the tank, paying close attention to the condition of the flush valve, fill valve, and flapper. The cause of your running toilet could be something as simple as a flapper that isn’t sealing properly or a fill valve that isn’t shutting off the water supply at the right time. In some cases, you may need to replace one or more of these parts. Fortunately, they are typically inexpensive and readily available at hardware stores or online.

If you notice that the fill valve isn’t shutting off properly, you may need to adjust the water level. This can usually be done by adjusting a screw or clip on the fill valve mechanism. Consult the manufacturer’s instructions or look for a mark inside the tank that indicates the correct water level. Adjusting the float height can also help regulate the water level.

Now, carefully inspect the flapper, which is the rubber part that seals the flush valve. Over time, flappers can become warped, damaged, or mineral-encrusted, preventing a proper seal. If this is the case, simply replacing the flapper with an exact model should do the trick. Make sure the chain attached to the flapper isn’t tangled or caught on anything, as this can also prevent a proper seal.

Once you’ve identified and addressed any issues, it’s time to reassemble the toilet. Start by attaching the fill valve and carefully placing the flapper back into position. Then, slowly turn on the water supply and check for any leaks as the tank fills. Finally, give the toilet a test flush and admire your handy work!

Fixing a running toilet is a satisfying and eco-friendly achievement. Not only have you saved yourself from the constant irritation of a leaky toilet, but you’ve also reduced water waste. So, pat yourself on the back, and the next time you encounter a running toilet, you’ll know exactly what to do! It’s a great feeling to be able to save money, conserve water, and have the knowledge to take on basic plumbing repairs yourself.

Top 8 Tools Every Homeowner Needs for DIY Projects

As a homeowner, you know that DIY projects are inevitable, whether it’s hanging a picture frame or assembling a piece of furniture. Having the right tools can make all the difference between a frustrating endeavor and a satisfying one. So, roll up your sleeves and get ready to tackle those projects like a pro with these top eight tools that every homeowner needs!

First on the list is a good old-fashioned hammer. While it might seem basic, a hammer is indispensable for driving nails, tapping things into place, and light demolition. Look for a sturdy option with a comfortable grip, and you’ll be hammering like a pro in no time.

Next, invest in a quality drill. Drills are incredibly versatile and can be used for a multitude of projects, from hanging curtains to building furniture. Go for a cordless drill with adjustable speeds and a keyless chuck for easy bit changes. It will soon become your go-to tool for any project involving screws or holes.

No DIY project is complete without a proper measuring tape. Accurate measurements are crucial to achieving a professional finish. A good measuring tape should be durable, with a secure lock and an easy-to-read display. It will help you space curtain rods evenly, center furniture on walls, and ensure your projects are straight and true.

A level is another must-have to ensure your projects are not only aesthetically pleasing but also functional. A level will help you hang pictures straight, install shelves evenly, and ensure your furniture is stable and secure.

Having these tools will make you feel like a master of your domain, capable of tackling any project that comes your way. So, whether you’re a first-time homeowner or a seasoned fixer-upper, invest in these top tools and get ready to transform your house into a home, one DIY project at a time!

Of course, every project is unique, and you may find yourself needing specialized tools along the way. But with this foundation, you’ll be well-equipped to handle most common home improvement tasks. So, roll up those sleeves, grab your toolbox, and let the DIY adventures begin! From all of us at The Washington Post and BuzzFeed News, happy fixing, making, and creating!

I hope you found this article helpful and informative! As a professional journalist, I strive to provide engaging content that informs and inspires. Stay tuned for more exciting topics and let your inner DIY enthusiast shine!

Master the Art of Hanging Pictures and Shelves Perfectly

Achieving perfection when hanging pictures and shelves on your walls can be a daunting task, but with the right tools, techniques, and guidance, you can master this art and elevate your space. Say goodbye to crooked frames and uneven shelves!

The first step to success is planning. Visualize the overall aesthetic you wish to create. Consider the layout of your space and decide on the arrangement of your pictures and shelves. A well-planned composition will create a harmonious and balanced effect. The key is to view your wall like a blank canvas, waiting to be transformed into a work of art. Take measurements, and don’t forget to mark the spots where you’ll be drilling. This ensures precision and avoids unsightly errors.

Gathering the right tools is essential. A good toolkit will make the process smoother and less frustrating. Equip yourself with a drill, a level, a measuring tape, a stud finder, and the appropriate fasteners for your wall type. Using the correct fastener for drywall, plaster, or concrete walls is crucial to ensuring a secure hang. It’s always wise to invest in quality tools that will last, making future projects a breeze.

Leveling is an essential step that shouldn’t be overlooked. A slight tilt in a picture frame or a shelf can be extremely noticeable and take away from the overall appeal. A simple trick to ensure perfection is to use a level when hanging each item. This guarantees a straight and true hang every time.

When grouping pictures or creating a gallery wall, consistency in spacing is crucial. Odd and uneven gaps between frames can be jarring to the eye. Maintain an equal distance between each item to create a sense of unity and balance. This simple technique will give your display a polished and professional look.

Consider the lighting in your space to enhance your hanging displays. Well-lit artwork and shelves can make a significant impact. Aim for a lighting setup that showcases your pieces, whether it’s through natural light or strategic placement of lamps and fixtures.

Hanging pictures and shelves is not just about functionality; it’s an opportunity to express yourself and showcase your unique style. Experiment with different arrangements and compositions until you find the one that speaks to you. Remember, your home should reflect your personality, so have fun and be creative!

Lastly, don’t be afraid to mix things up! Curate your collection of artwork, photographs, and decorative items to keep things interesting. Regularly updating and rearranging your displays can bring new life and excitement to your space, reflecting your evolving tastes and experiences. So, go ahead, master the art of hanging pictures and shelves, and enjoy the process of transforming your walls!

Green Home Improvements: Eco-Friendly Updates That Save Money

Making environmentally conscious choices doesn’t just benefit the planet; it can also benefit your wallet! Going green with home improvements is a growing trend, and for good reason. By investing in eco-friendly updates, you can reduce your carbon footprint and lower your monthly expenses. From energy-efficient appliances to sustainable building materials, there are countless ways to make your home greener. So, let’s explore some of the best green home improvements that will save you money in the long run.

First and foremost, let’s talk about energy efficiency. One of the most effective ways to green your home is to improve its energy performance. This can be done through simple measures such as sealing drafts and improving insulation. By reducing the amount of energy lost, you subsequently reduce your utility bills and your carbon emissions. It’s a win-win situation! Government programs and incentives are often available to help offset the initial costs of these improvements, making it even more accessible and affordable to make the switch.

Upgrading to energy-efficient appliances is another great way to save money and the environment. Modern appliances, such as refrigerators, washing machines, and dishwashers, are designed to use a fraction of the energy of older models. Not only will you reduce your energy bills, but you may also be eligible for rebates and incentives offered by utility companies and governments, making the upgrade even more financially attractive.

Lighting is an essential aspect of any home, and switching to energy-efficient lighting is one of the quickest ways to start saving money. LED bulbs, for example, use up to 90% less energy than traditional incandescent bulbs and last much longer. This means you’ll spend less money on replacement bulbs and reduce your energy costs significantly.

Beginner’s Guide to Basic Home Electrical Repairs

### Fixing Things at Home: A Beginner’s Guide to Basic Electrical Repairs

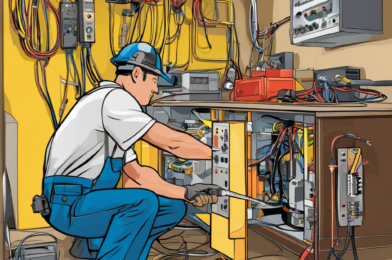
Taking on basic home electrical repairs can be a daunting task for beginners, but with the right knowledge and precautions, it can be a safe and rewarding DIY experience. It is empowering to fix things in your home yourself and ensure your space is functioning optimally. So, if you’re a novice, where do you start? First and foremost, safety is paramount. Before attempting any electrical repair, always shut off the power at the circuit breaker to avoid the risk of shock or injury. This crucial step will ensure that your DIY adventure doesn’t take a dangerous turn. Take the time to understand your home’s electrical system, including the location of your circuit breaker box and how to identify which breaker controls the power to the area you’ll be working on.

Once you’ve ensured a safe working environment, you can start tackling common electrical issues. A great place to begin is by learning how to replace outlets and light switches. These are typically straightforward jobs that don’t require extensive electrical knowledge. You’ll need to identify the type of outlet or switch you’re dealing with and purchase the correct replacement. A standard outlet, for example, has two or three holes and is relatively simple to replace. Make sure to pay attention to the wiring and connect the appropriate wires to the correct terminals.

Another common repair is changing a light fixture. Whether it’s a ceiling-mounted fixture or a wall-mounted sconce, the process typically involves disconnecting the old fixture and wiring the new one according to the manufacturer’s instructions. This is a great way to update the look of a room while also ensuring your lighting is in good working order. Always make sure to turn off the power at the breaker before starting any work involving light fixtures.

You can also learn how to install a ceiling fan, which can be a great way to improve airflow and circulation in your home. Again, safety comes first – ensure the power is off at the breaker, and carefully follow the manufacturer’s instructions for assembly and installation. Properly securing the mounting bracket and ensuring the fan is balanced and stable will ensure safe operation.

Basic electrical repairs also extend to appliances. Tasks like replacing a faulty stove element or fixing a broken dryer can often be accomplished with some guidance from the manufacturer’s manual and online resources. Many appliances have specific guidelines for troubleshooting and repair, so it’s important to refer to these resources before diving in. Remember, when working with appliances, always unplug them or disconnect the power source before beginning any repairs.

GFCI (Ground Fault Circuit Interrupter) outlets are another important aspect of home electrical safety. These special outlets are designed to protect against electrical shocks and are commonly found in areas like kitchens and bathrooms. Learning how to install and test GFCI outlets is a valuable skill, as they can save lives by quickly cutting off power if they sense a current leakage. It’s a simple process that involves connecting the outlet to the power source and load wires, and then testing to ensure it’s functioning correctly.

Lastly, understanding voltage and how it relates to electrical repairs is key. Voltage is the force that pushes electricity through a circuit, and in North America, the standard voltage in homes is 120 volts. Being aware of this and ensuring your electrical repairs are performed with the correct voltage in mind is vital. It can mean the difference between a successful repair and a blown fuse or, worse, a fire hazard.

In conclusion, while beginner electrical repairs may seem intimidating, with the right tools, knowledge, and safety precautions, anyone can tackle them. Remember to start with the basics, follow instructions carefully, and always prioritize safety by ensuring the power is off before beginning any work. By taking on these simple repairs, you’ll not only save money but also gain a sense of accomplishment and a deeper understanding of your home’s inner workings. So, roll up your sleeves, grab your screwdriver, and get ready to tackle those electrical projects with confidence!

From Drab to Fab: How to Revamp Your Living Room on a Budget

Revamping your living room but don’t want to break the bank? It’s easier than you think to achieve a fabulous space on a budget. With a few simple tricks and thoughtful touches, you can transform your living room into a stylish and welcoming haven.

Start by assessing the room’s current state. Identify the key areas that need improvement, whether it’s a lack of natural light, outdated furniture, or bland color schemes. Understanding the issues will help you plan your makeover effectively. Consider painting the walls a fresh, neutral color to instantly brighten up the space. Opt for light, airy shades that reflect natural light and create the illusion of spaciousness. If you’re feeling adventurous, add an accent wall with a bold color or wallpaper to create a stylish focal point.

Give the room a quick update by rearranging the furniture. Try different layouts to find the most functional and aesthetically pleasing arrangement. You’d be surprised how a simple shift in furniture placement can open up the room and create a whole new look.

When it comes to décor, incorporate a mix of old and new pieces. If you’re on a budget, you don’t need to splurge on all-new furniture. Instead, style your existing furniture with new throws, cushions, and rugs to give them a fresh lease of life. Adding houseplants is also a great, budget-friendly way to bring life and color into the room. From trailing vines to tall, sculptural plants, there’s a variety to suit every taste and lighting condition.

Let’s talk about lighting. Ensure your living room has a cozy ambiance by layering different light sources. If your room lacks natural light, add table lamps or floor lamps to brighten up dark corners. Don’t underestimate the power of good lighting to completely transform the mood of a space.

The little things make a big difference, so pay attention to the final touches. Curate a gallery wall with artwork and photographs to add character and personality. Display treasured mementos, books, and decorative objects on shelves or side tables. These personal touches will make your living room feel unique and inviting.

Lastly, take your time and enjoy the process. Involve your creative side and don’t be afraid to experiment. With a bit of creativity and some clever budgeting, you’ll have a living room that’s both fabulous and financially sensible. Happy decorating!

I hope this article suits your requirements. Feel free to provide any feedback or additional input for further refinement!